I just wanted to do a quick check-in post, since I promised some articles and it’s been over half a month since then. It’s been a busy time, so I haven’t finished the first of the Livestream Anatomy articles, but I do have quite a lot written down. The problem is, I chose audio as my first topic, and managing audio is… shall we say, 90% of the work of putting on the livestream.
How’d that livestream go, anyway?
We had a splendid time on the stream with some incredibly fun and friendly guests. Demon’s Souls is a great game with a great community, so it could hardly have been bad! This was my first time completing the game, so it was quite an exciting run for me.
As for our fundraising goal, while we weren’t quite able to reach the heights of our 2018 earnings, we did raise $1,709 for the Cancer Research Institute. For a channel of our size, that’s an incredible measure of generosity from our viewers, friends, and family. I’m so super grateful to everyone who stopped by and shared the link around!
What kept you busy the rest of the month?
A number of things, some good, some bad. The big thing that ate up a lot of my weekend time was putting up a fence for our doggo.
When we visited the house, there was a fence in place as well as two sheds. However, the sheds were built too close to the neighboring properties, and had to be torn down. Well, the lovely previous owners of our house thought that securing a 50 foot length of fence to a shed—without any substantial fence posts—was a winning plan.
So obviously we had to replace that, and of course, there has to be a big, deep-rooted tree right near the property line to make our post-hole digging experience that much more fun.
😬
But we did it, and now we’ve got a solid fence, and our dog loves us!
What’s on the docket for the future?
Well, dear reader, I definitely plan to continue the article series. I also had a bit of a tweetstorm recently about doing a .hack// series, wherein I would take a deep dive into the story and lore of the .hack// quadrilogy (the first set of videogames), .hack//SIGN, and .hack//Liminality. That project would require me to play through all those games again, which may run around 80-100 hours, depending on my efficiency level. As I write that, I’m beginning to see why there’s no definitive ‘Dot Hack Deep Dive’ yet.
The big thing for the near future, however, is National Novel Writing Month! I’ve got a fun project planned in my Worldwyrm Universe, which I hope to expound upon here. I think I may do a little day log to go along with that, posting them here every week during NaNo. I’m definitely going to be sharing some fiction writing on here in the near future, either way!
Finally, I’ve decided I want to make a browser-based 2D RPG in the vein of Final Fantasy 1. I’m looking at the PixiJS graphics framework to handle the WebGL stuff, but I plan to make the rest of the engine on my own! That’s obviously a huge undertaking, so I think I’ll save that for after noveldraft 1 😅
So there will be much to write about (and, given NaNo, there will be much writing done). It may be a slow month on Andrew Dice Dot Art, but rest assured, I’ll have quite a lot of words to share at some point!
Every year, my friend and I put on a 24-hour livestream event to raise money for the Cancer Research Institute. It’s always an excellent time, and we’ve had so much luck getting attention from the gaming community. We play SoulsBorne games (Dark Souls, Demon’s Souls, Bloodborne), so there’s a nice built-in audience there with fans of that series. We’ve also had the good fortune to get in touch with some big names in the SoulsBorne community and have them on as guests! Running this event has been very humbling, and I’m constantly in awe of the SoulsBorne community.
What gets sent to our viewers is a fairly simple-looking stream—some voices, some sound effects, a nice layout—but they don’t get to see all the complexity that goes on behind the scenes. As the “technical producer” (a fancy title I gave myself), I can assure you that there tends to be a tremendous amount of effort that goes into serving you with a consistent-looking and -sounding stream. Unfortunately, I am also a bit of a crazy person who can’t leave well enough alone. I can’t help up the ante each year with new tech!
I want to take an opportunity to walk you through all of the unreasonably complicated things I’ve put together for this year’s stream (which is happening this Saturday-Sunday, 2PM EST to 2PM EST!!). I’m still a bit too busy to hash together one big article, but this topic is varied enough that it seems appropriate to break it up into multiple articles 🙂
Over the next couple weeks, keep an eye open for my “livestream tech deep dives”. If you’re a streamer yourself, you may find some useful info! If you like to watch streams, maybe the perspective will be interesting on its own. As always, I encourage you to share comments and questions below, or contact me via the number of links on my about page!
There’s a joke I like quite a bit about the size of the first rocket. Legend has it that the rocket was sized the way it was so that its peices could fit through train tunnels. Train tunnels were sized so that the sudden pressure change wouldn’t blow out the windows in train cars. Train cars are sized that way so that they fit on the tracks. Tracks are sized that way because horse-drawn carriages created consistent ruts in roads, so they just went with that standard width. Carriages were sized that way to fit behind two horses side-by-side.
I’ve put out a couple of new things since doing my last update (back in June 2018 😱), so I figured it might be a good idea to get back to doing monthly-ish updates.
Where on Earth Were You?
That’s a big question, my friend, one with some fairly big answers to go with. The biggest of all has got to be the whole house hunt thing. Trixie and I began our house hunt in earnest back in October 2018, and we were storming down that warpath for several months until we finally closed on a house in April of this year. Don’t try to buy a house in the winter, folks.
So that was an immense personal undertaking, one which barely left time for extracurriculars (beyond my standing obligations to tabletop and Twitch streaming). The work of that hasn’t ended, either, since we got kind of a half-fixer-upper. We just finished the last of our painting two weekends ago! It’s been a super exciting time.
Also we’re engaged now!
Yeah! That was awesome. I bought Trixie a beautiful rose gold ring with a floral band (exactly suited to her personality) and proposed three days before Christmas on top of a mountain. The height of romance, if you will (oh ughh puns).
I think another part of what happened is that I fell off the wagon when it came to personal studies, so I just didn’t have much to write about (and felt kind of ashamed whenever I thought about it). I mean, I was in the process of trying to spend more money than I’ve ever spent in my life, so I did kind of want to make sure that went well. But I’m always eager to beat myself up for some reason.
SO. What’s new here? Besides the house and the fiancee?
Great question! I’ve got:
A hot new website, replete with beautiful minimalist design
1/3rd of an edited manuscript from my NaNoWriMo project
A bunch of ambitious ideas for further writings
A voracious desire to write more
I’m not prepared to announce anything, because I’m still… you know… figuring out what exactly I’m going to do. But you can be sure it’ll involve Writing More, and I’ll give you the additional hint that I’d really like to release some fiction.
Moreover, I think it’s important for me to continue to flex my writing muscle in various ways, so I’m going to make it a goal of mine to release here more frequently. I’m talking pieces like my Prolog article, not just monthly updates. Stuff I really have to dig into in order to write about.
Hopefully that means the site will be more interesting for Ya’ll passing through! Maybe then I’ll get more people to subscribe to the mailing list 😅
Please feel free to drop me a line in the comments below! Tell me about your writing projects, or your struggles with motivation, or just call me a crazy dweeb, whatever your heart desires! I have also provided several links to places where you can harass me on my about page, so please do leverage those!
I wanted to take a bit to talk about my latest and greatest software tool I’m using to get stuff done: MKDocs. If you know me personally, you’ll be well aware that I don’t take software tools lightly. I love dabbling with new stuff, trying to squeeze out all the functionality I possibly can in order to push things to their limits.
If you’d like to skip to me just talking about MKDocs already, feel free to jump ahead!
Motivation
As I’ve been very focused on my writing projects lately (which you can hear more about over on my Twitter), I’ve been trying to optimize my bag of writing tools. During National Novel Writing Month 2017, I picked up Scrivener to take care of business. It was great, though I found it tough to just pick up and play with on such a tight timeline. It allowed me to write snippets and re-organize them, though, which was a tremendous help. I felt like, for the most part, Scrivener was really excellent at staying out of my way and letting me work.
However, I am impossible to satisfy, so I kept looking around after NaNoWriMo was done. What I really wanted was a single-user wiki to manage all my crazy fantasy world details. I had been using WikidPad for my tabletop notes, and that was working just fine, but something about it felt archaic. I found those notes difficult to back up and transfer because some of the files were more than just text. Don’t get me started on the lack of phone-based options for updating those notes!
Of course, rejecting WikidPad on the basis that it “feels archaic” is pretty silly, considering I now use plaintext for everything, but I digress.
I tried DokuWiki, which was nice for customization options. Unfortunately, it requires PHP, and I didn’t want to install PHP on this server. I could edit DokuWiki pages from my phone, but the web interface was pretty lackluster.
Enter MKDocs
Due to my obsession with Markdown, I searched for a Markdown-based wiki solution. What popped up was MKDocs: a Markdown-based static wiki generator written in Python.
I expect folks will get limited use out of this due to one sticky little keyword there: static. This means that you can’t edit pages without being able to push files to the webserver, which isn’t a tremendous obstacle for me (I update my whole website by pushing with git), but is a bit too tech-y for many. For those who want to follow along, I’ll write a bit about how to get that set up in the setting up MKDocs deployment section.
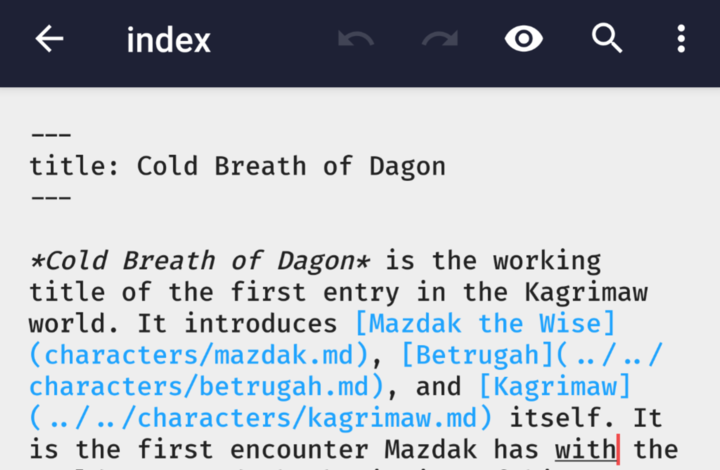
An example of how linking behaves in VS Code
The chief draw of MKDocs is that you are given freedom to just write in Markdown. There is no odd system for linking between pages; you just make a standard markdown link to another page and MKDocs figures it out. This means that your links are clickable both within the editor and on the generated webpage. This feature is key, I find, because you’ll no doubt find yourself wanting to quickly hop into a linked page to edit. MKDocs tries to stay out of your way.
This seems so basic, but it is so great that MKDocs is just a regular folder structure filled with regular files. I have had no shortage of headaches migrating my notes between all these different tools, so just having a sane collection of files feels extremely freeing. If I ever get around to making my own writing tool, you can bet it will work off the same philosophy and accept the same folder structure.
When you want to preview your changes, MKDocs does its best to accommodate smoothly. It’s written in Python, so if you’re a developer, you’re likely to already have the tools you need to run it! Install it via pip install mkdocs and you’re ready to roll. mkdocs new wiki will make a new wiki in the “wiki” folder, and if you cd into that folder and enter mkdocs serve, mkdocs will give you a nice preview site at localhost:8000 that auto-refreshes when you change a page. Super painless.
Did I mention that MKDocs is gorgeous?
A beautiful MKDocs page, rendered with the Material style
I use the “Material for MKDocs” style for my wikis because I absolutely love the clean look it provides. You can grab that theme for yourself by installing it with pip install mkdocs-material. The theme’s page has instructions on how to set it up.
“Andrew,” I hear you ask, “you’ve mentioned phone editing a few times now; how does MKDocs address this?” Good question, reader! It absolutely doesn’t, but, Android has some great apps for editing Markdown and using Git. I use Markor (FOSS) for editing and Pocket Git (paid) myself.
Markor in action, a nice little Markdown editor for AndroidPocket Git, delivering a simple Git client for Android
Pocket Git makes it very easy to set up multiple remotes for your Git projects. personally, I store my drafts in a private GitHub repo, and have a separate “deploy” remote which lives on my webserver. But we’ll talk about that in more detail below! An additional feature I like, and this is more an endorsement of Android, is that you can use Pocket Git to browse the files in your Git repo and set Markor as the default app for opening .md files. You practically never have to “leave” the Pocket Git app if you use it this way. What a convenient workflow!
How to Deploy MKDocs with Git
The second half of this article is a tutorial on setting up deployment with Git. If you’re not interested in the nitty gritty, feel free to skip to the end!
Alright, so you’ve gotten this far and you’ve decided to try it out. Or maybe you just want to see the details of actually putting MKDocs to use. Either way, we’ll take a look at my easy-to-use setup for automatically deploying an MKDocs wiki with Git.
This setup requires you to have SSH access to your webserver. I also use Ubuntu on my webserver, so your mileage may vary with this. I don’t receive anything for saying that I host with DigitalOcean, but they’ve been nothing but reliable and painless for me, so I’m happy to recommend them!
Setting Up the Server
In general, I like to set up my Git repos with a “dev/” folder which holds some scripts to get up and running on a new machine. For my MKDocs repo, I have a server_init.sh and an init.sh for server and client, respectively.
dev/server_init.sh
#!/bin/bash -l

# Setup for the webserver, assuming there is NO repo endpoint setup yet
GIT_REPO=$HOME/notes.git
SITE_ROOT=/var/www/andrewdys.art
NOTES_SUBDIR=$SITE_ROOT/public_html/notes

echo --------------------------------------------
echo Creating git repo and site dir...
mkdir $NOTES_SUBDIR
mkdir $GIT_REPO
pushd .
cd $GIT_REPO
git --bare init
popd
echo Done.

# Install mkdocs basics needed to build the site
echo --------------------------------------------
echo Installing MkDocs and plugins...
INITSCRIPT=./init.sh
chmod a+x $INITSCRIPT
$INITSCRIPT
echo Done.

# Set up the hooks folder and symlink
echo --------------------------------------------
echo Setting up server hooks...
HOOKS_FOLDER=$GIT_REPO.hooks
mkdir $HOOKS_FOLDER
rm -rf $GIT_REPO/hooks
ln -s $HOOKS_FOLDER $GIT_REPO/hooks

# Ensure hooks are made executable
cp -r hooks/* $HOOKS_FOLDER
find $HOOKS_FOLDER -type f -exec chmod +x {} \; \
   -exec stat --printf='%n - %U:%G\n' {} \;
echo Done.
dev/init.sh
#!/bin/bash -l

# Setup for new environments which wish to use the mkdocs
# dev server
pip install -r requirements.txt
init.sh uses a requirements file to tell pip what modules to install.
dev/requirements.txt
mkdocs
I have a couple of plugins/extensions in my requirements.txt which I haven’t listed here. All you really need is mkdocs, but you may like to tweak your installation a bit. Obviously, if you don’t want to use extensions, you can alter your init.sh to just pip install mkdocs.
The last two scripts needed are post-receive and buildscript.sh.
dev/hooks/post-receive
#!/bin/bash -l

GIT_REPO=$HOME/notes.git
TMP_GIT_CLONE=$HOME/tmp/notes
HOOKS_PATH=$HOME/notes.git.hooks

# Clone the repo to a temporary working directory
echo --------------------------------------------
echo Cloning MkDocs site...
git clone $GIT_REPO $TMP_GIT_CLONE
echo Done.

# Copy the hooks to the HOOKS_PATH
cp -r $TMP_GIT_CLONE/dev/hooks/* $HOOKS_PATH
find $HOOKS_PATH -type f -exec chmod +x {} \; \
   -exec stat --printf='%n - %U:%G\n' {} \;

# Call the build script from the Git repo
while read oldrev newrev refname
do
   pushd .
   branch=$(git rev-parse --symbolic --abbrev-ref $refname)

   # Checkout the branch
   pwd
   # For some reason, this is necessary?
   unset GIT_DIR
   (cd $TMP_GIT_CLONE && git checkout $branch)

   BUILDSCRIPT=$TMP_GIT_CLONE/dev/buildscript.sh
   if test -f "$BUILDSCRIPT"; then
      echo --------------------------------------------
      echo "$BUILDSCRIPT exists; executing..."
      cd $TMP_GIT_CLONE
      chmod a+x $BUILDSCRIPT
      $BUILDSCRIPT
      echo Done.
   fi

   popd
done

# Cleanup
rm -Rf $TMP_GIT_CLONE
exit
dev/buildscript.sh
#!/bin/bash -l

SITE_ROOT=/var/www/andrewdys.art
NOTES_SUBDIR=$SITE_ROOT/public_html/notes

# Perform the MkDocs build
echo --------------------------------------------
echo Building MkDocs wikis...
pushd .
cd wikis
for d in */ ; do
   pushd .
   cd "$d"
   mkdocs build --clean
   popd
done
popd
echo Done.

echo --------------------------------------------
echo Cleaning existing wiki...
rm -rf $NOTES_SUBDIR/*
echo Done.

echo --------------------------------------------
echo Copying site build over...
pushd .
cd wikis
for d in */ ; do
   pushd .
   cd "$d"
   mkdir $NOTES_SUBDIR/$d
   cp -r site/* $NOTES_SUBDIR/$d
   popd
done
popd
echo Done.

echo --------------------------------------------
echo Copying top-level index...
cp dev/index.html $NOTES_SUBDIR
echo Done.
What Does it Do?
Okay! So what have we actually done with these scripts? Running server_init.sh will do several things for you. It handles:
Setting up a bare Git repo
Ensuring the destination subdirectory exists (NOTES_SUBDIR)
Deleting the hooks folder
Creating an external hooks folder for us to symlink to
Creating the hooks symlink
Copying the hooks from dev/hooks into the external hooks folder
Ensuring the hooks are executable
At the end of this all, your server should be ready to receive a push, at which point it will run the post-receive script. What that script does is fairly complicated-looking, but it can be boiled down to this: after a push is received, the script will checkout any branch that was pushed and run the buildscript.sh contained within. This lets you have a different build procedure for different branches—for example, you may wish to have a drafts branch that builds your wiki and puts it in a private, password-protected section of your site.
The buildscript.sh will build every wiki contained within the “wikis” folder in a temporary staging folder. I like to have a bunch of separate wikis for my different projects so there’s no cross-contamination, and this setup makes it painless to add new wikis whenever I feel like it. Then, it cleans out the NOTES_SUBDIR (to get rid of any pages you may have deleted), and copies all the new files from the staging area to the NOTES_SUBDIR. Finally, it copies over a file from the dev folder to serve as an index for your NOTES_SUBDIR. Mine redirects to one of my wikis, like so:
Even though your server is ready to receive the push, that doesn’t mean you’re ready to send one. There’s still one more crucial step to set up your local Git repo. You have to add the webserver Git repo as another remote. The form of the remote url will be name@domain:GIT_REPO, where name is the username you use to administer your server, domain is the domain name pointed to the server, and GIT_REPO is the directory where your repo is stored on the server. Mine is andrew@dysart.dev:~/notes.git.
You’ll add this remote by typing git remote add deploy name@domain:GIT_REPO from your local Git repo. From then on, you can git push as normal, and when you want to push your changes to the live server, you’ll git push deploy master instead (or whichever branch name you choose). It’s that easy!
In Conclusion
I hope you’ve enjoyed this overlong discussion of why I like MKDocs and how to put it to use yourself. If you have any questions, comments, or corrections, feel free to contact me in the comments below or through one of my many contact info icons on the about page!
Interested in what makes me tick? Do you like odd programming journals, or perhaps epic fantasy? Maybe some tabletop? Consider subscribing to my mailing list to get notified about my new postings!